
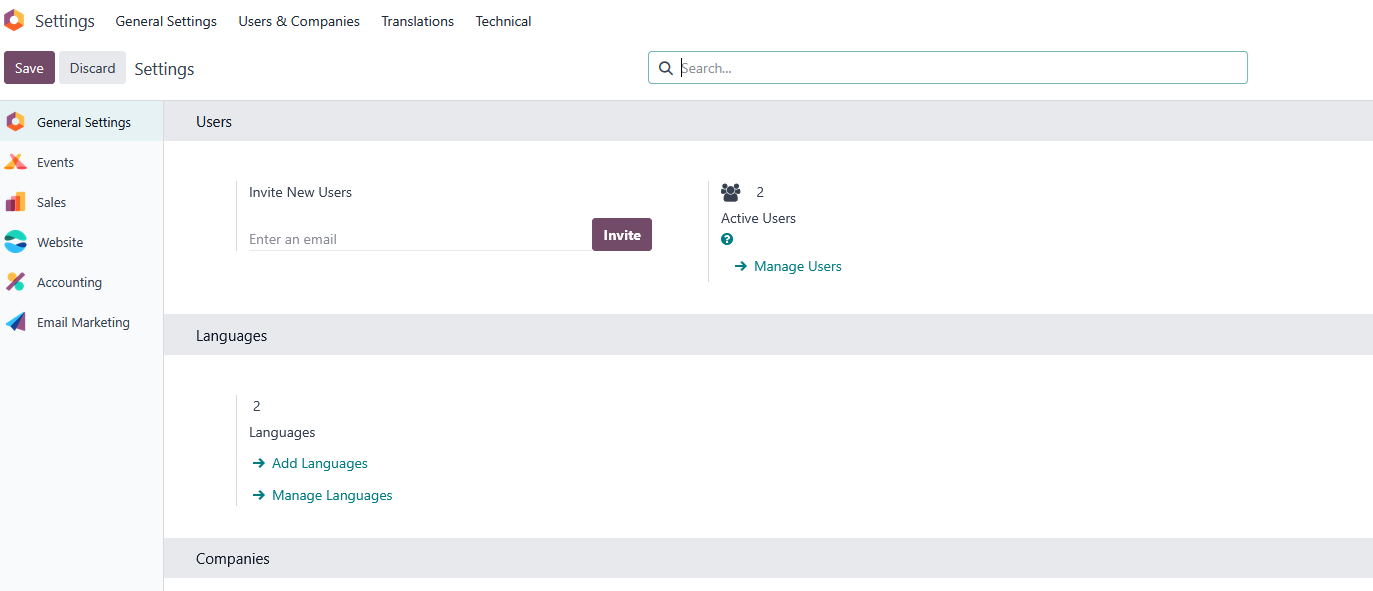
In Odoo Settings, you can configure essential company details such as the name and address, ensuring your business information is accurate and up to date.
You also set the unit of measure for your products, manage your email settings, and link your social media accounts like WhatsApp and Facebook through Meta integration.
Additionally, you can update contact information, define user permissions, customize mobile and SMS settings, and enhance security by enabling reCAPTCHA to protect your platform from automated abuse.
At the end of the “Settings” page in Odoo, you can activate the developer mode by scrolling down to the “Developer Tools” section and clicking on “Activate the developer mode.”
This action grants access to advanced features such as database management and administrator options, unlocking technical menus and tools essential for customization and development within Odoo.
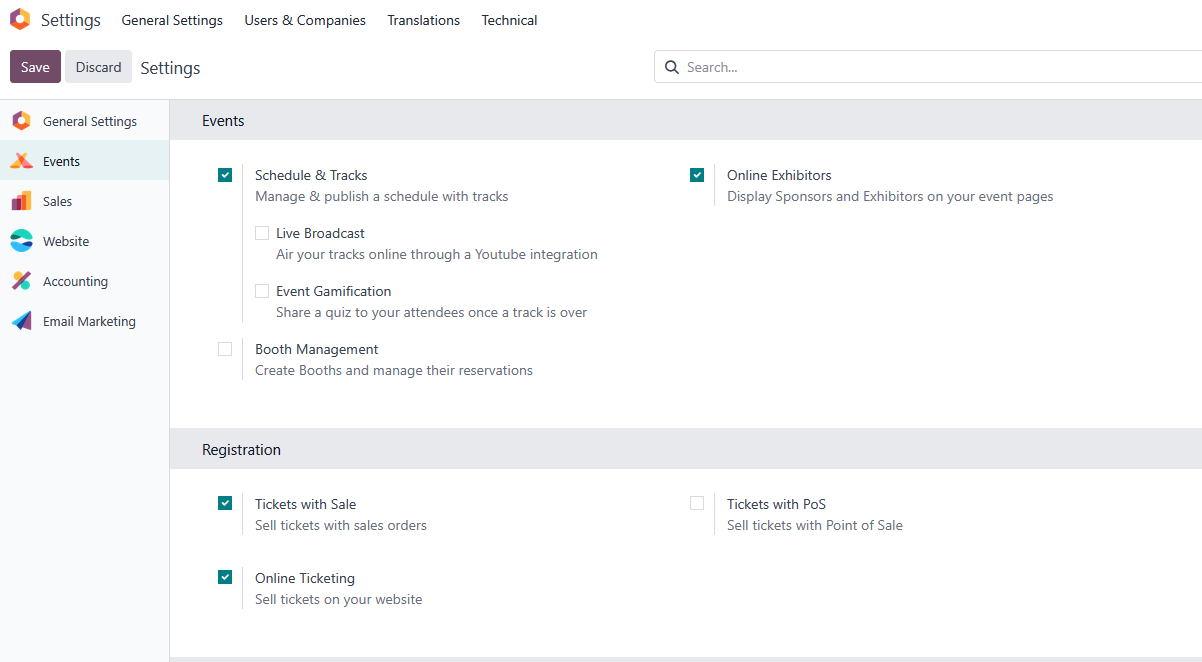
In Odoo Settings under EVENTS, choose “Scheduled & Track.” In the Registration section, enable “Tickets with Sale” to sell tickets via sales orders and activate “Online Ticketing” to sell tickets directly on your website.
You can also enable “Use Event Barcode” to allow barcode scanning for attendance tracking.
Additionally, note that a Booth is defined as an area made up of one or more standard units of exhibit space, useful for organizing event layouts and exhibitor spaces
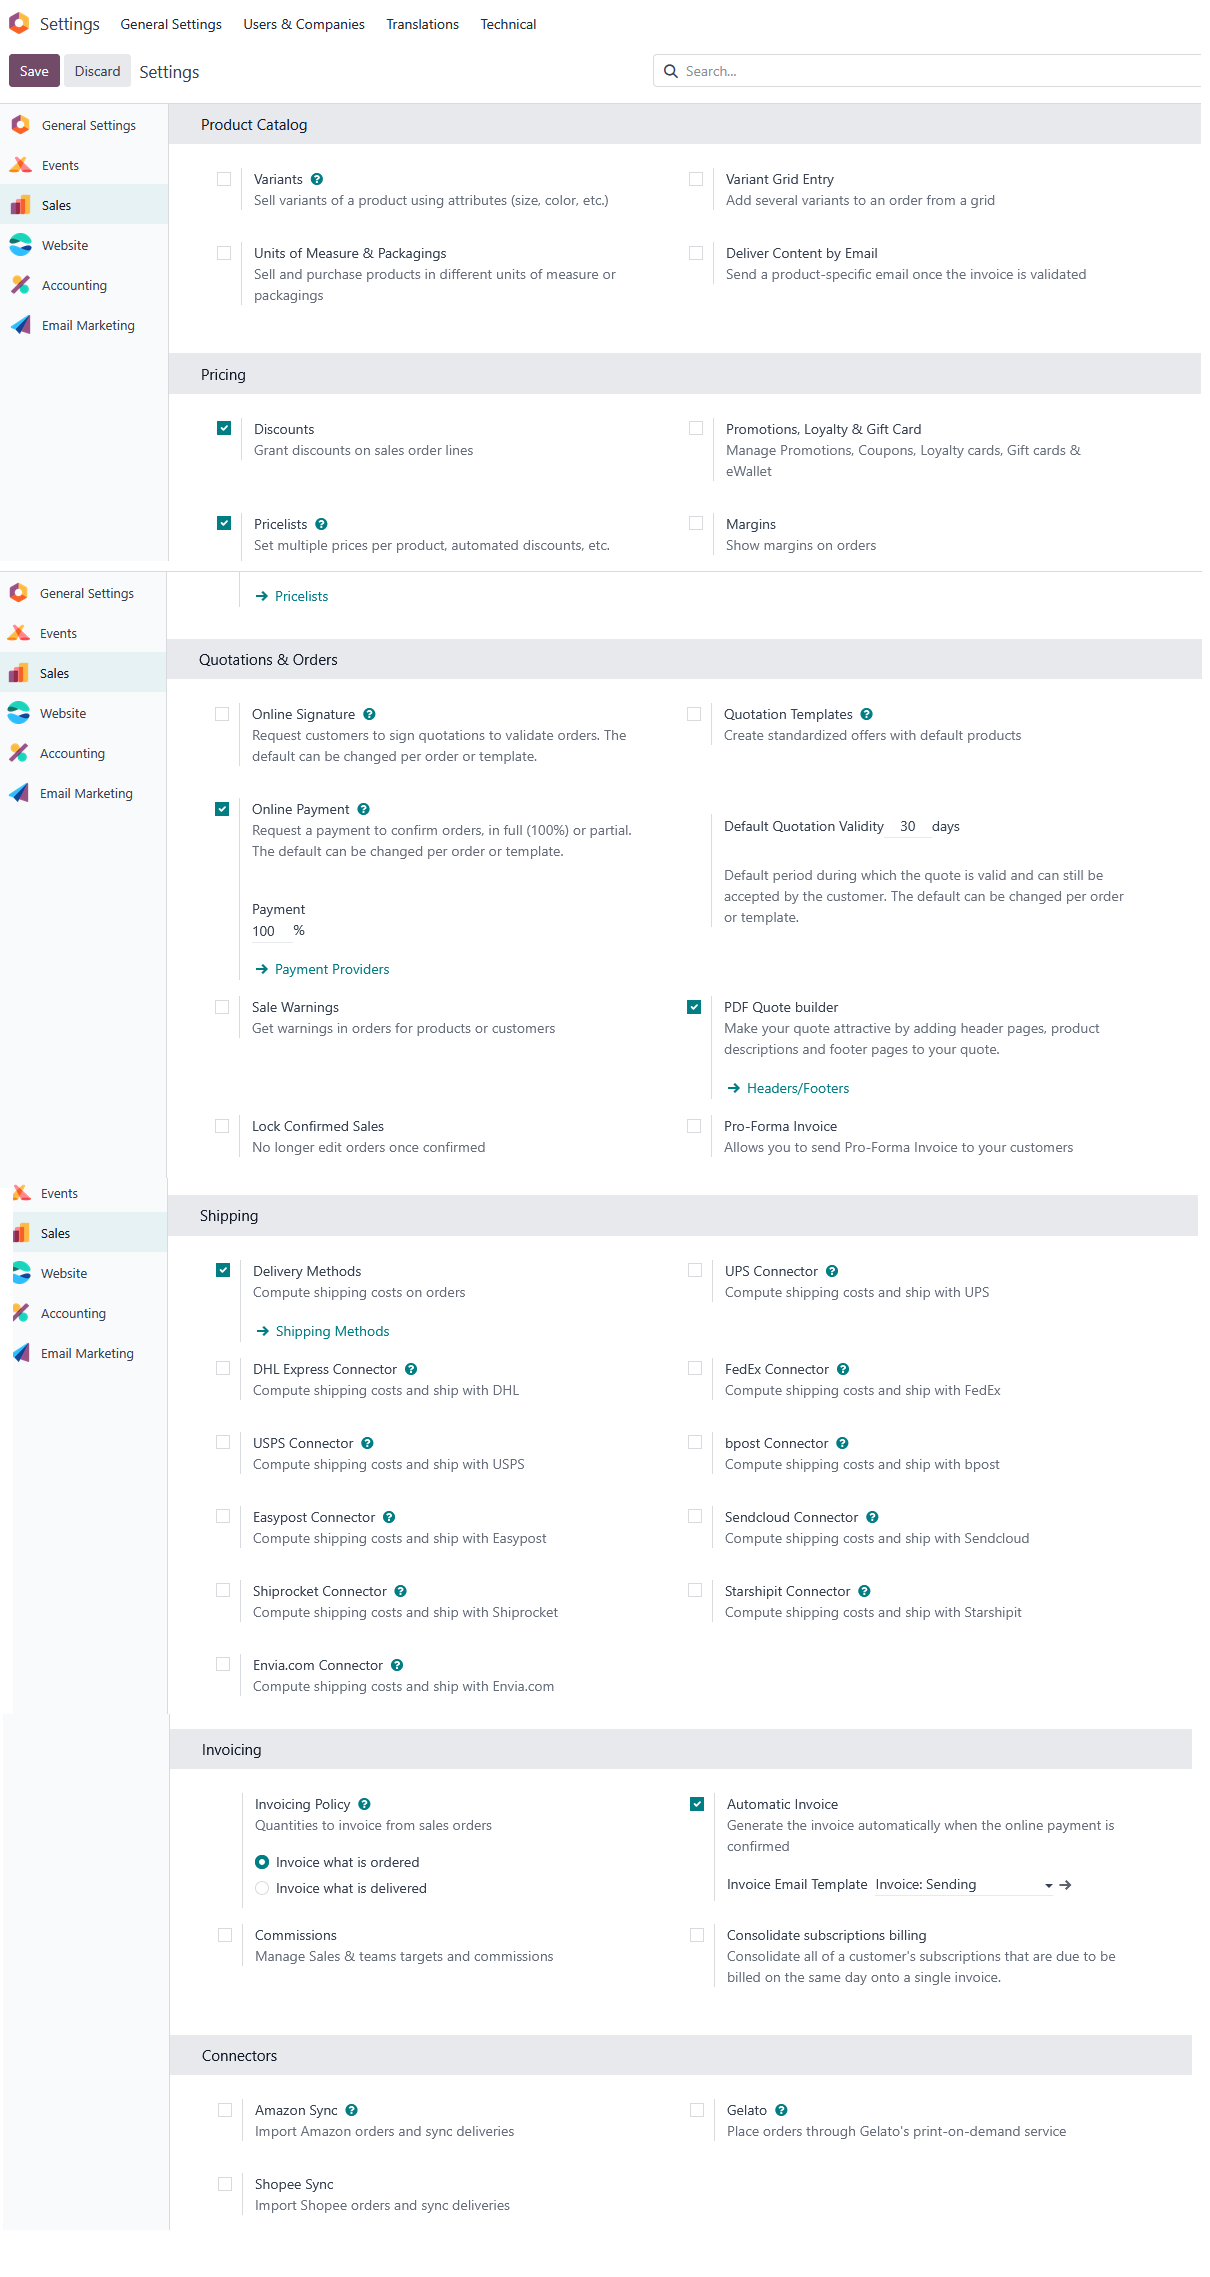
In Odoo Sales, you can enable features such as Discounts, Pricelists, and Online Payment to enhance your sales process.
Online payment integration supports various providers, allowing customers to pay securely via credit cards or other methods directly through your website or customer portal, like STRIPE.
The PDF Quote Builder allows you to create attractive quotes by adding header pages, detailed product descriptions, and footer pages, making your proposals more professional and clear.
In the Invoicing settings, selecting “Invoice what is ordered” ensures invoices match the actual sales orders.
Additionally, you can synchronize your products with your Amazon account to streamline inventory and sales management across platforms.
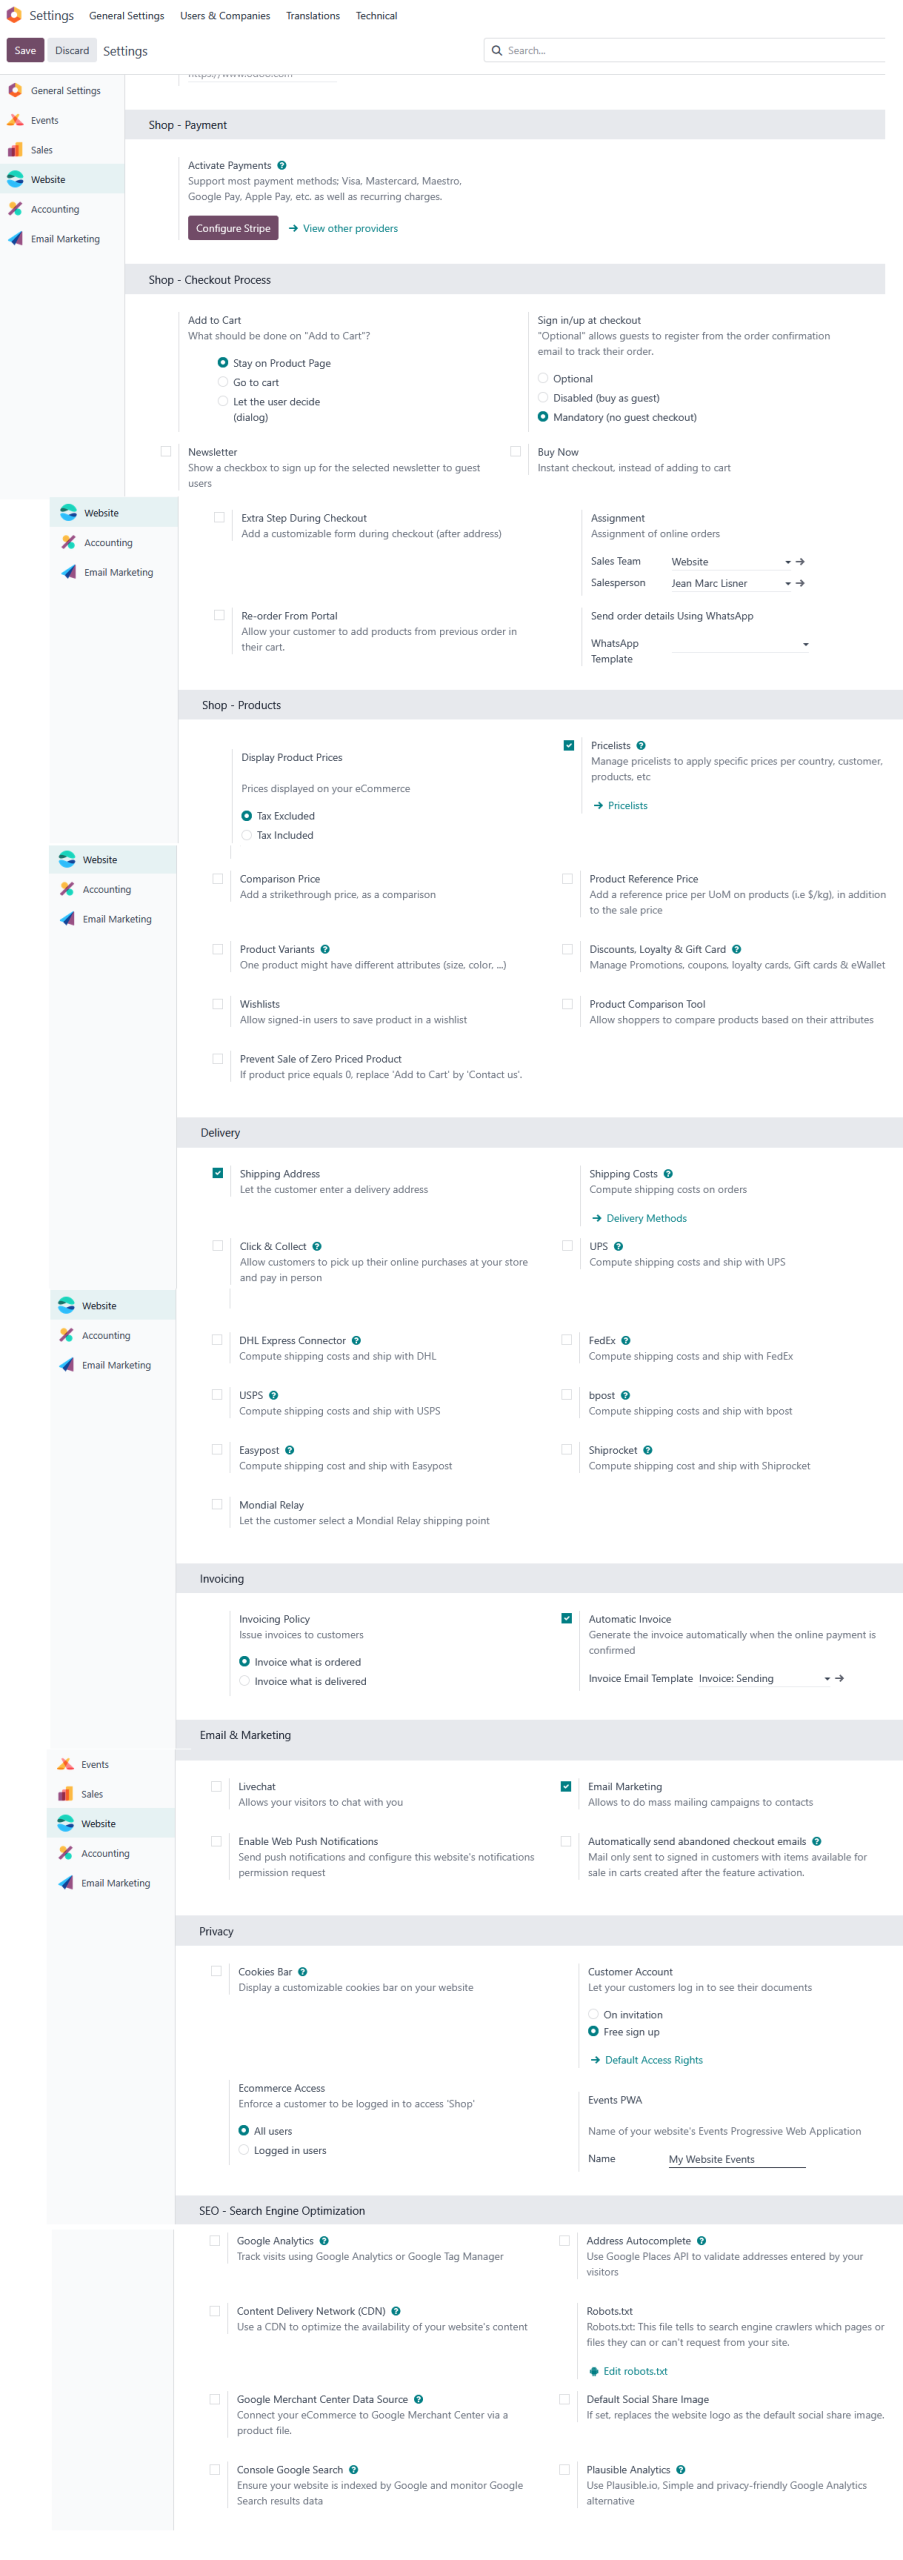
In Odoo Settings for the Website module, you can choose the language for your website, set its name, and upload a favicon to customize its appearance.
Importantly, this is also where you link your Odoo website to Stripe, enabling seamless online payment processing through Stripe’s gateway.
These settings help personalize your website and integrate essential payment functionality directly from the website configuration page.
In Odoo Settings for the Website, you set up your Pricelist by enabling the feature under the Shop – Products section.
Here, you can configure whether product prices on your website are displayed with Tax Included or Tax Excluded.
This global setting determines if the prices shown to customers already include taxes or if taxes are added later at checkout, and it applies uniformly across all your websites.
You manage pricelists further by creating and customizing them under Website ‣ eCommerce ‣ Pricelists, allowing different pricing rules based on criteria like country, currency, or customer segment.
In Odoo Settings for the Website, you can configure the option to “Invoice what is ordered,” which means customers are invoiced as soon as the sales order is confirmed, streamlining your billing process.
You can also enable “Email Marketing” to engage customers through targeted campaigns directly from your website settings.
Additionally, you allow “All Users to Visit your Website,” making your site publicly accessible without restrictions.
Finally, you can customize your SEO settings to improve your website’s visibility and search engine ranking, helping attract more visitors.

In Odoo’s Accounting Settings, you define critical financial configurations for your business. Start by selecting your Fiscal Localization (e.g., Japan) to align with regional regulations.
Set your Taxes (e.g., 10%) and Currency (e.g., JPY/Yen), and customize Invoice Formats for compliance. For product sales, configure Units of Measure & Packaging to standardize inventory tracking.
Under Customer Payments, enable Online Payment for invoices and Purchase Receipts, and activate Document Digitization to process PDF invoices automatically.
Define Bank Transactions & Payments for seamless reconciliation, and declare your Fiscal Year to structure financial periods. Finally, enable Accounting Firms Mode, which:
Makes document sequences editable across all records.
Adds a «Total (tax inc.)» field to automate line creation with correct accounts/taxes, speeding up data entry and ensuring accuracy.
These settings centralize financial control while optimizing compliance and efficiency.
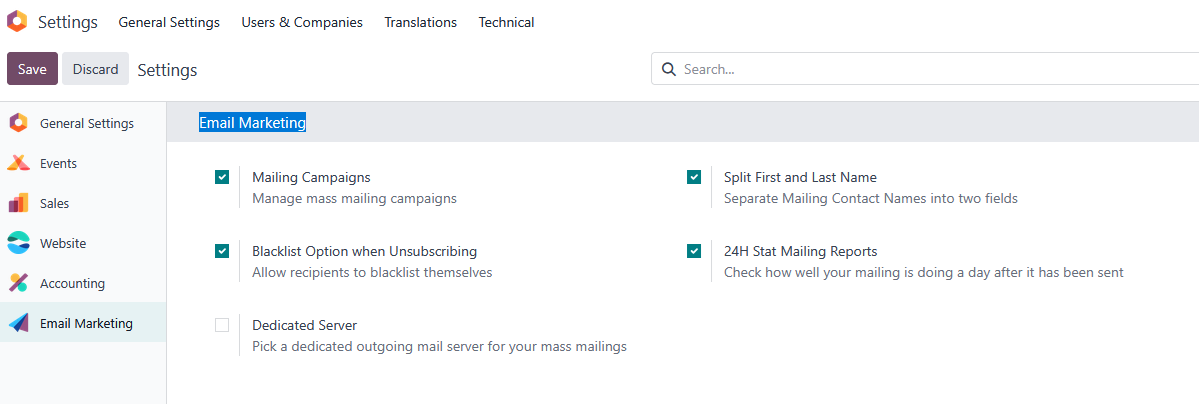
In Odoo Settings for Email Marketing, you can configure several important features to optimize your campaigns.
You can manage mass mailing campaigns, allowing you to efficiently reach large audiences.
The option to split first and last names lets you separate mailing contact names into two fields for better personalization.
You can also enable the blacklist option, allowing recipients to unsubscribe and automatically add themselves to a do-not-contact list.
Additionally, Odoo provides 24-hour stat mailing reports, so you can review how well your mailing performed a day after it was sent, helping you measure engagement and improve future campaigns.